Organizing Your Gear Throughout the Home

From the garage to the closet, here are some tips on organizing your gear wherever you can.

Are you an outdoor enthusiast? Do you spend as much time as possible biking, hiking, backpacking, or skiing? If so, you’ve probably accrued a decent amount of gear over the years. The good news is your high-quality equipment will last for a long time. However, the real challenge lies in figuring out where to store all of those pieces you’ve spent so long collecting. As any gear fanatic will tell you, when you’re faced with a finite amount of space — or more commonly a finite budget — creativity is the key to finding gear storage solutions.

In the garage

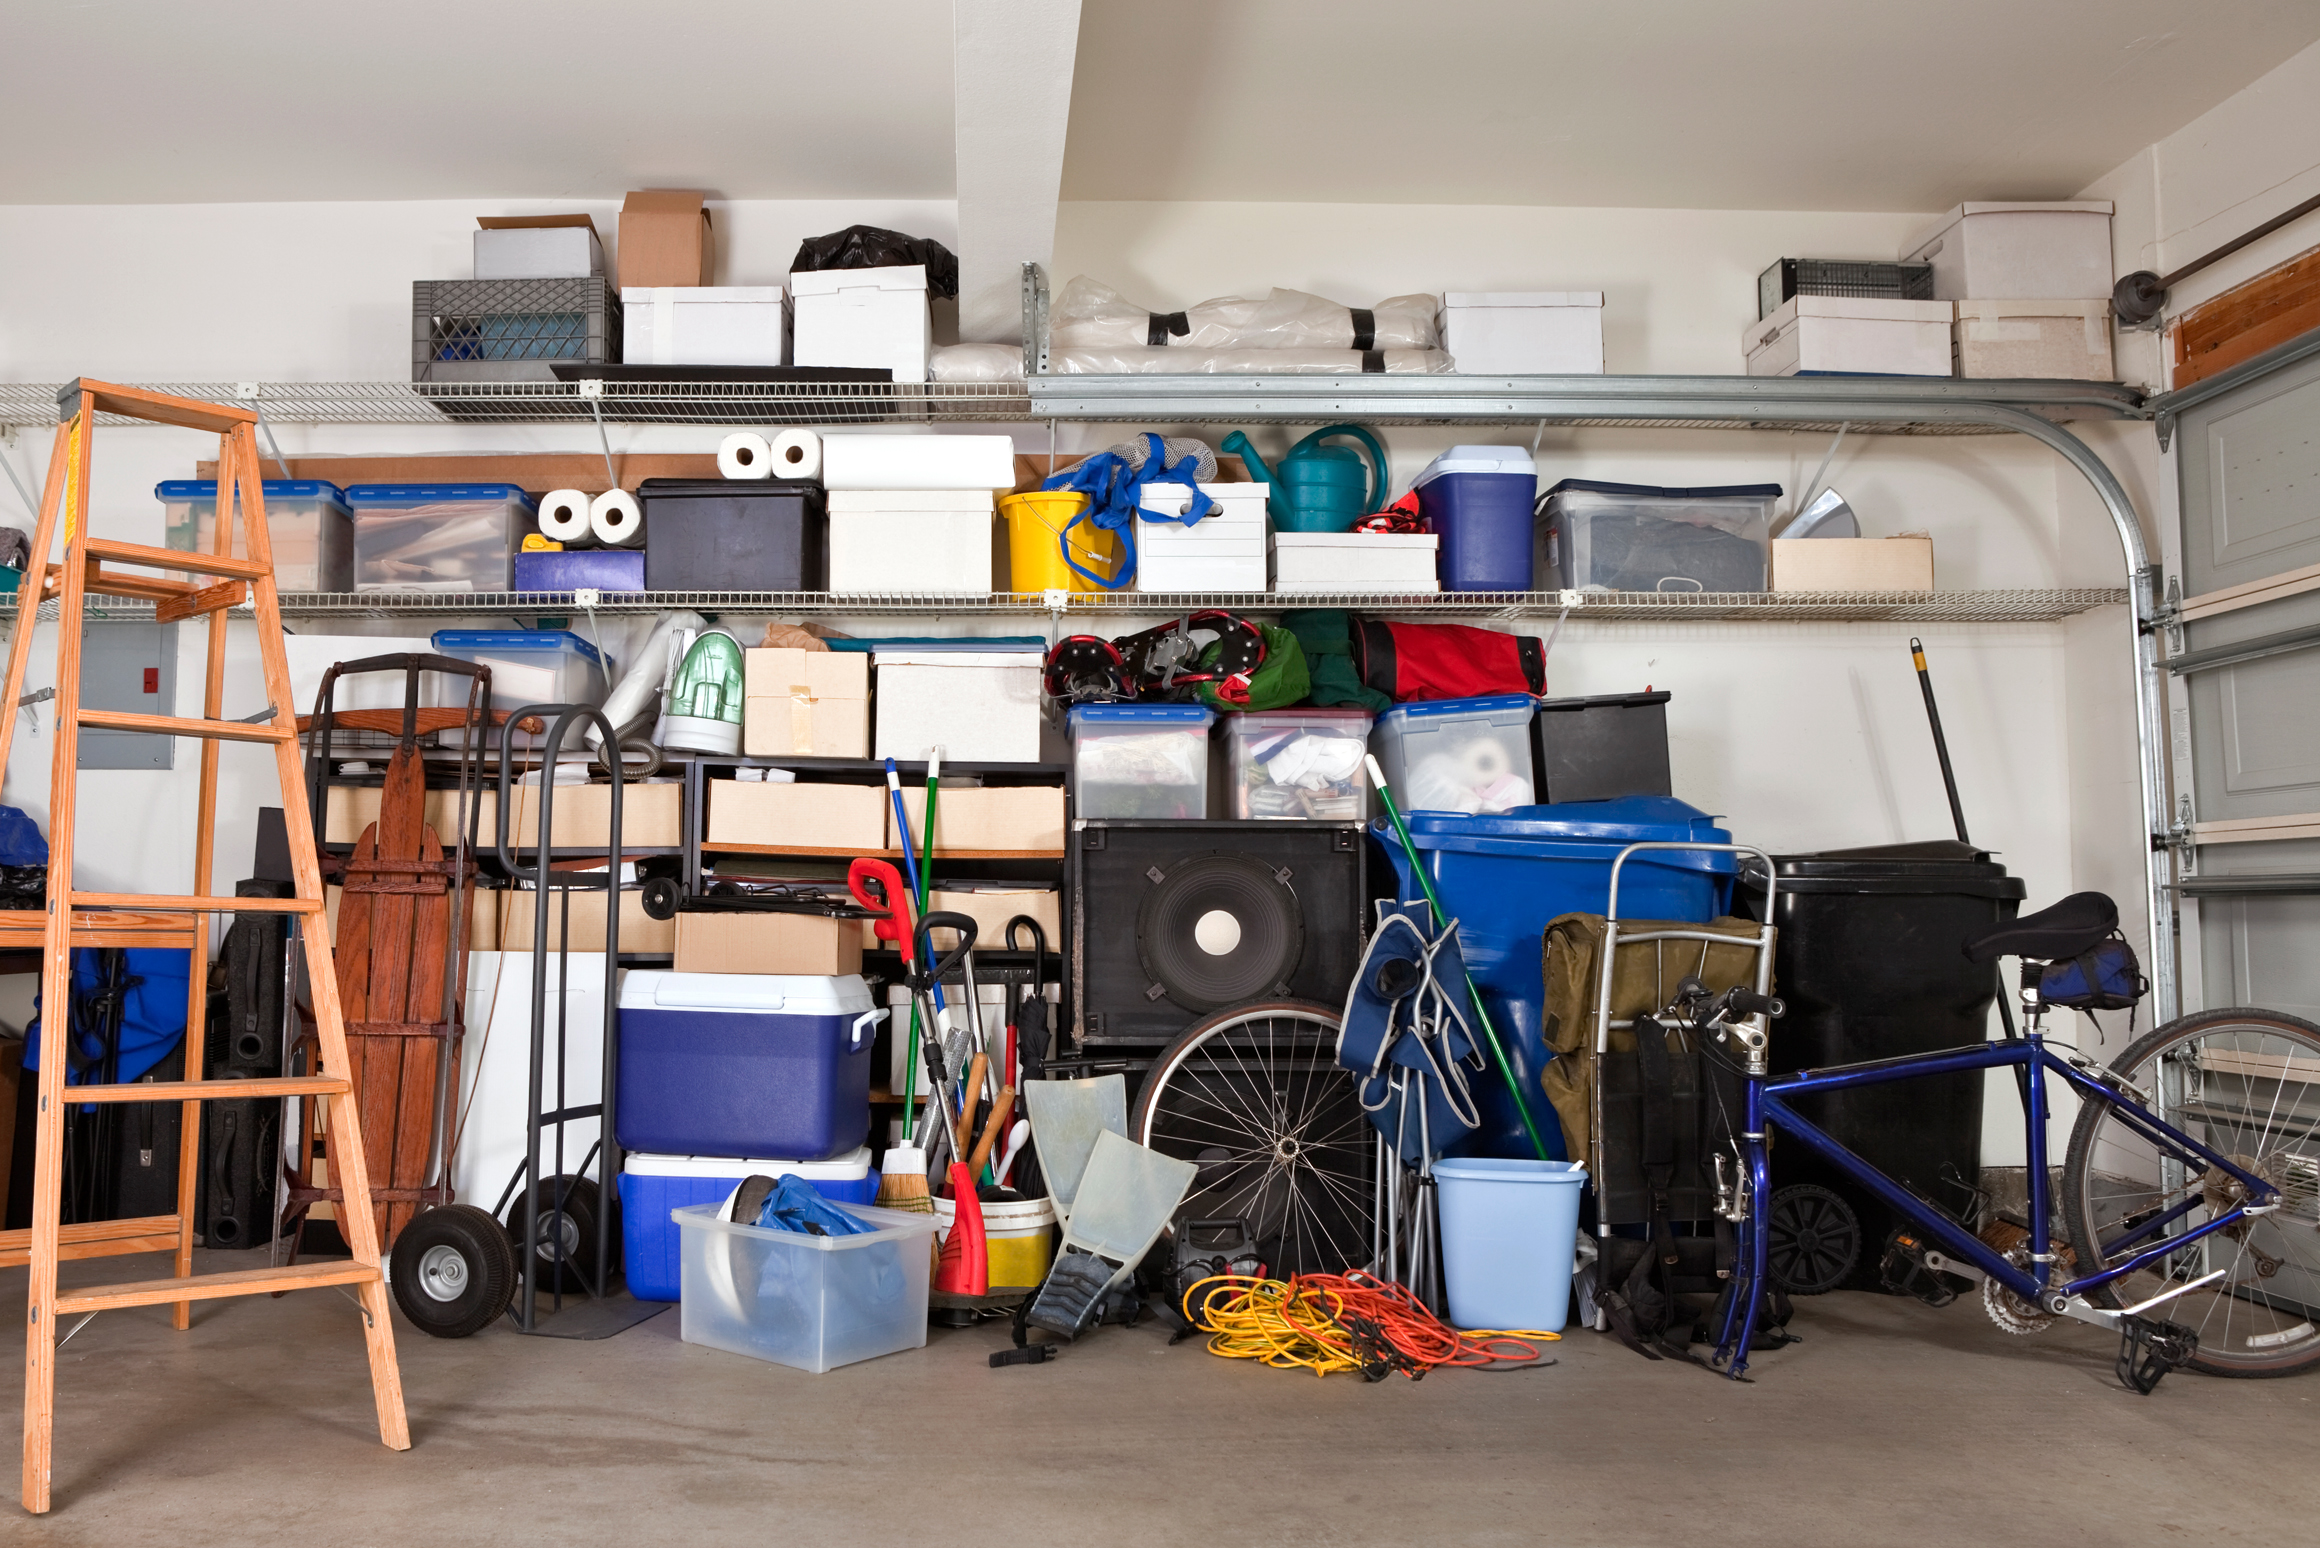
If you’re lucky enough to have a garage, then you’ve probably got more available space for storage. One of the best garage systems for big, bulky gear is heavy-duty shelving mounted on the ceiling. These shelves are perfect for getting everything — from coolers and camping chairs to crash pads and canoes — up off the floor. Depending on the height, you may even have room on the underside to hang a bike or two.

For those concerned about accessibility, there are plenty of ground-level shelving systems designed to make organizing simple. And, if you don’t want to deal with shopping around for the perfect unit, building and mounting shelving systems is actually a fairly simple project. Just about any budget-conscious adventurer who owns some tools and isn’t afraid to tackle basic carpentry can handle it. Once you’ve got the bulk of your gear off the ground and onto your shelves, you can start fine-tuning your organization. Sturdy hooks and pegboard, for example, provide a great solution for climbing ropes, skis, and packs (which can also be stuffed with additional gear when not in use).

In the shed or basement

If you’ve got space in the basement, you can do a lot with a small clothing rack or wardrobe closet. These are great for keeping climbing gear or camping equipment organized in one central location. Plus, if you position the rack away from the wall, you can use the space behind to stash bigger stuff like crash pads. For out-of-sight sheds or storage rooms, another consolidation option is a large stuff sack. These tend to come with new sleeping bags for long-term storage, but they’re also great for loading soft goods like ground mats or camping tarps. These bags usually have a cinch cord too, making them easy to hang in the corner of a room.

Although not ideal for frequently used gear, stacking bins with lids can provide the perfect solution for sorting and organizing off-season equipment. They’re easy to sort, label, and transfer. Plus, if your basement doubles as a recreational room, you can drape a row or two of containers with a cool piece of fabric and use the top as kid-friendly play space for LEGOs or small toys.

In closets, cabinets, and cupboards

If all you’ve got to work with is your own living space and some interior closets, there’s not much else to do but make the very best of every available nook and cranny. To start, try allocating the entire corner of a closet for ceiling-to-floor shelving that can be used for smaller gear like helmets and boots. Corner space can provide a surprising amount of useful storage. In larger closets, opt for full shelving to hold bigger gear like tents, stoves, and coolers. Then use baskets and bins for keeping smaller things organized. If you’re especially ambitious, you can even find storage opportunities on the closet door itself by building additional shelving or hanging organizers.

If shelving isn’t an option at all, make use of the closet rod. You can sling packs and snow gear around regular clothing hangers, while carabiners offer a better option for rope coils, straps, or crampon storage bags. When space is just too tight, look for out-of-the-ordinary alternatives. Try loading any unused suitcases with sleeping bags and seasonal clothing, for instance. You can also check for openings in cabinets that aren’t in the bedroom or hall closets—while you may not want to store skin boots under the kitchen sink, you may find the perfect compartment for your tackle box. If all else fails, consider putting your teenage Tetris skills to practical use by rearranging your current storage layout to free up real estate elsewhere.

No matter how much (or little) space you have to work with, you can find viable storage solutions. With a little ingenuity, you’ll be able to neatly store all of your gear for easy access the next time you’re adventure-bound.

Recent Articles

Alex Rivera

July 10, 2023 • 3 min read

Alex Rivera

July 10, 2023 • 2 min read

Alex Rivera

July 7, 2023 • 2 min read

Back to top

Easy Landscaping Ideas for Summer

These easy, DIY landscaping ideas can turn your garden into a paradise.

Home landscaping can be easy and fun for everyone in the family. In fact, even if you have a small front or backyard, fewer projects provide as big a boost to your curb appeal than landscaping. And lucky for you there are plenty of landscaping projects of varying cost and complexity to choose from. Whether it’s planting a new flower garden, adding turf, trimming trees or installing landscape curbing, there is a DIY landscaping project for every homeowner out there. To keep things simple, we found five of the easiest landscaping projects around for you to consider trying this summer. Once completed, your home’s curb appeal will stand out from all the other houses on the block.

1. Add Colorful Flowers

If you walk outside and see a dull, boring landscape, you need some color. Colorful flowers provide a warm and welcoming feel to any landscape. They’re attractive to look at, and create a safe space for helpful wildlife like bees, birds, and earthworms.

Flowers fall into three categories: annuals, biennials, and perennials. Annuals are flowers that only last for a single growing season. You’ll want to plant these as soon as the last frosts are passed in order to get the best blooms from them.

Biennials last for two years, but don’t get really pretty until the second year. The first year, they will stay small, close to the ground, and mostly green. Year two, you’ll start to see flowers and more depth to the flowers.

Perennials are plants that can return again and again, season after season. During the winter months, the growth above-ground will die off and the plant may appear dead, but in the spring, they will start to green and bloom again.

Remember, don’t go too overboard with your flowers. If you overdo it, your landscaping maintenance costs could add up.

2. Mow Your Lawn & Cut In Edges

If you wanted to keep things even simpler than planting new flowers, regular maintenance can transform your backyard. When it comes to landscaping, maintenance always starts with mowing and cutting. During the summer, you should regularly mow your lawn. Sadly, there is no exact height all lawns should be, but the experts say to never take off more than 1/3 of the grass height. Once a week is ideal in the summer, but biweekly is acceptable in the early spring when rain is more frequent. If you miss a week, do not overdo it next week. Your lawn needs to be long enough to produce shade and protect sensitive roots from being exposed to sunlight. The Garden Counselor explains: “Taller grass will grow deeper roots, keep the soil moist and crowd out many weeds. Keeping grass mowed short limits the amount of root growth that occurs.” This is the only way your lawn will grow and keep its shiny, green exterior. Cutting your lawn too short ruins your grass and shocks your lawn system. In addition to regular mowing, active DIYers should edge their lawns. A neatly edged lawn along a sidewalk or driveway is a thing of beauty. Luckily, basic string trimmers can get the job the done.

3. Curb Your Landscape

If you’d like to add some precision or separation from your yard and walkway, driveway or house, then landscape curbing is a terrific and easy way to add some flare to your yard. Landscape curbing adds a decorative border around your lawn. Homeowners can use brick, pavers, or concrete to curb their landscapes, but if you want to minimize costs and keep this a DIY project, we highly recommend brick or pavers. Brick and pavers are easy to install and require little DIY expertise.

Once you pick out the perfect brick or paver for your landscape, start leveling the ground where the curbing will go. Pack in your brick and pavers and then surround them with gravel, sand, or landscape rocks. Make sure everything is packed in tightly and securely. Then sit back and enjoy the tidy new border around your lawn. Bear in mind, you can always change your curbed landscape if you change your mind in a few years. As opposed to concrete, pavers and brick are easy to remove and don’t require professional assistance.

4. Grow Vegetables

Few landscaping projects can teach your kids more about the earth and economy than growing vegetables. Not only will you get to spend quality time with your children, but it could also save you a few trips to the grocery store. If you’re serious about growing a vegetable garden, scheduling is key. Unlike watering or mowing your lawn, you cannot skip a day when it comes to vegetable gardens. They simply will not grow without regular upkeep. According to vegetable and landscaping experts, homeowners should plant shorter season edibles together and longer-season veggies in a separate section of the garden. This way, when the shorter season plants die off, you can plant more veggies on top of them and double your garden’s yield.

5. Add Lighting

Summers should be spent outside, but if you don’t have enough lighting around the house, how can you enjoy your glorious backyard at night? Whether you’re night swimming, stargazing or enjoying an after-dinner drink, homeowners need some source of light for their front and back yards. Luckily, when it comes to landscaping lighting, you have plenty of options to choose from.

String lights, or lanterns, are always an excellent choice for extra lighting. If placed strategically, they give a nice overall glow to a yard and reduce shadows. On the other hand, spotlighting and small lights along the patio or walkway work well if you’re looking for more shadows and brighter patches of light. If you’ve spent months working on improving your backyard, you owe it to yourself to light your space – enjoy all your hard work by day and night!

Improving and updating your home’s landscape may seem daunting, but with these easy, DIY landscaping ideas, it can slowly turn into the crown jewel of the neighborhood.

Recent Articles

Alex Rivera

July 10, 2023 • 3 min read

Alex Rivera

July 10, 2023 • 2 min read

Alex Rivera

July 7, 2023 • 2 min read

Back to top

Best Tips to Drive a Moving Truck

Get used to the handling and the braking, and you're just about there on how to drive a moving truck.

Driving a moving truck isn’t easy, and for most, it’s a new experience completely. You may be nervous about your first moving truck adventure, so we put together a list of everything you need to know to make driving a breeze.

Find the right size

Moving trucks range in size from a conventional pickup truck with an 8-foot bed up to a 26-foot moving truck. The 26-foot truck can move five or more rooms at a time and has a cab that seats three, offering a more spacious ride for two adults. If you’re moving with kids or pets, you’ll want to rent an extended cab pick-up truck and trailer combo, because you’ll need a back seat.

Take time to get used to the handling

Keep in mind, even the smaller 12-foot moving truck handles differently than a car. Your moving truck does not handle like a car or a large SUV. It’s tall and wobbly, with very loose steering. Because it’s so heavy, especially loaded with your stuff, it takes longer to stop in a moving truck than in a regular passenger vehicle.

You won’t want to jump right on the highway when you first pick up the van. Drive it around empty from the rental location, maybe even around the parking lot a few times, to get used to the feel. Remember, it will take even longer to accelerate or stop after it’s loaded.

Learn how to brake a moving truck

A loaded moving truck is heavy, which makes it difficult to stop. Couple the momentum of the large truck with all your cargo inside, and you want to avoid stopping short. Always pay attention to the traffic down the road, go slowly, and leave plenty of space between you and the vehicle in front of you. These basic driving tips become even more critical when you are hauling anywhere from 3,000 to 10,000 pounds behind you.

Use your mirrors, upgrade your truck

Today’s automotive technology gives us backup cameras and alerts, but you probably won’t find these options in rental moving vans. You often won’t even find a center rear-view mirror because there’s nothing to see. Request a new model truck and you might enjoy a cleaner cab and slightly better gas mileage. Amenities aside, what really matters is that you rent a truck large enough to get your belongings to your new home. Make sure you know how many cars you are taking and whether you’ll need a trailer to haul one of the vehicles, as well. You can save a bundle with a do-it-yourself move, but you’ll want to be prepared for the journey that lies ahead.

Slower traffic, keep right

On our nation’s interstates, it’s common courtesy and a traffic law to keep right, except when passing. In a moving truck, it’s best to stick to the right lane and not pass at all. In some states, trucks may be prohibited from the left lane, and may even have lower speed limits than other vehicles. Regardless of the speed limit, your truck may be equipped with a governor that limits your speed to 75 mph.

How to turn a truck

Remember, a truck makes wide right turns, and can tip over if you turn too fast. To turn safely, come to almost a complete stop. Check your left mirror to make sure you have enough room in the oncoming traffic lane, and stay tight against the curb to turn. If you hit the curb, that’s better than the alternative of hitting another vehicle. Just back up and try again.

Know the max headroom

“Max Headroom” is not just a computer-generated character from the ‘80s. It stands for “maximum headroom” and represents the clearance available for a truck to pass under a bridge, go through a drive-thru, or enter a parking garage. If you spot a sign like this, you’ll need to know the height of your truck at its highest point to make sure you can fit.

Use the right gas

Remember, some rental trucks run on diesel, not regular fuel. Confirm the type of gas before you leave. If you put unleaded fuel into a diesel truck, you could ruin the engine and face a hefty fine.

You can do this

Driving a large rental truck isn’t really as scary as it sounds. Pay attention to the rules of the road even more than usual, give yourself plenty of time to brake, turn slowly, and use your mirrors. And just imagine the sense of accomplishment you’ll have when you reach your destination.

Recent Articles

Alex Rivera

July 10, 2023 • 3 min read

Alex Rivera

July 10, 2023 • 2 min read

Alex Rivera

July 7, 2023 • 2 min read

Back to top

10 Ways to Win at Apartment Living

Be an apartment superhero with these 10 tips on the apartment lifestyle.

Sometimes apartment life is anything but ideal. Living units are small, neighbors are noisy, and landlords can be tenacious. However, with just a little bit of creativity, you can turn your temporary rental into the perfect home. Here are 10 tips to help you start maximizing your apartment life.

1. Customize your space.

Most apartments feature outdated home fixtures and boring paint colors, but you can fix that. Use your contract as a guide to transform your apartment into a space you love. Many apartments allow you to paint the walls if you repaint them to their original color before you move out. You can also hang art pieces or apply temporary wallpaper to modernize your space. With a few simple fixes like installing new fixtures and replacing “pretty much everything in your apartment that’s just being held on with a screw,” as Lifehacker puts it, you can make your apartment feel like home without losing your deposit.

2. Invest in noise-canceling alternatives.

If loud neighbors are disturbing your beauty sleep, reduce the noise that gets in. Buy some good earplugs, use a white noise machine (or a white noise app), lay down thick rugs, or turn on a loud fan. The Huffington Post shares some unique ideas, too — they recommend moving furniture, mounting acoustic tiles, and even using curtains to muffle noise.

3. Learn to love where you live.

A great neighborhood can make all the difference in apartment living. Explore your city like you’re a tourist. Take weekend day trips to new locations in your neighborhood. Visit the local shops and parks that surround your apartment. Experience a sunrise and a sunset from your patio. When you go for a walk, take a new route and discover the hidden gems around your apartment — maybe you’ll stumble upon a pretty pathway or some interesting street art. Do as much as you can to find what makes your neighborhood unique.

4. Be a model roommate.

Being an ideal roommate goes beyond washing your dishes and cleaning your hair out of the bathroom drain. Consider setting some general roommate rules. How will you handle overnight guests? Who will purchase shared appliances? Do you need to establish quiet hours? She Does the City recommends you get all those boring, nitty-gritty details out of the way first. Decide how you will split costs for communal apartment supplies like toilet paper and garbage bags. Set a policy for sharing food. Agree on a mutually acceptable thermostat setting. Communication is key when living with your best friend or a somewhat complete stranger.

5. Follow apartment rules.

Every apartment has a set of rules that are usually easy to maintain. Things like quiet hours, pet policies, and garbage removal may seem like guidelines that were made to be broken, but they may be important to your fellow apartment dwellers, so be courteous. If you respect the rules that matter to your landlord and co-tenants, they’ll (hopefully) return the favor when you have requests, too.

6. Host a great event.

One of the best parts about having your own space is sharing it with others. Invite your friends and loved ones to enjoy your apartment with you. Host an event that’s your style — a dinner party, movie night, or cocktail hour. You don’t need a huge space to do this. As long as the place is clean and clutter-free, your guests will feel pampered with space to sit and set drinks. Additionally, the importance of great food, plentiful drinks, and a relaxed host cannot be overstated.

7. Respect common spaces.

Hallway railings are not bike racks, front stoops are not trash dumps, and the common room isn’t your office. Everyone’s rights must be considered in these common areas. Keep phone conversations quiet in the halls, return misfiled letters in the mailroom, and never make someone clean up after you.

8. Get to know your neighbors.

You don’t have to be best friends with your neighbors, but do be friendly with them. Get to know their names, hold the elevator door for them, and wave when you see them outside. Good neighbors are rare, but by being one yourself, you’ll increase the chances that your neighbors will treat you kindly, too. Fellow tenants will be more willing to turn down the volume on the TV for someone they regularly chat with in the halls than for a hermit who ignores them.

9. Resolve differences peacefully.

An unfortunate side of apartment living is the fact that you may butt heads with your neighbors. The key is to keep your cool. Be direct about issues, but don’t start the conversation when you’re heated. Curbed’s guide to common neighborly disagreements suggests approaching issues with a bottle of wine in hand — the neighbor from hell isn’t going to transform into a model tenant, but there’s no need to start a war. Also, try to resolve the issue with the offending neighbor first, before calling the landlord. Use the apartment rules as your armor and keep records of your conversations. The latter is especially important if the issue does escalate.

10. Maintain a good landlord/tenant relationship.

Be respectful and kind to your landlord, and your landlord will be more responsive to your needs. Beyond paying your rent on time, treat your landlord like you would treat a boss you want to impress. Engage in small talk when you see them in the halls, and compliment upgrades they’ve made to the building. Don’t be a nagging tenant, either. Fix minor stuff yourself instead of running to maintenance every time a faucet starts to leak.

Living in a small rental space in a high-density housing situation can be tough. But it’s also got its perks, like low costs and new friends. You’ll be spending a lot of your time in your apartment, so take the time to make the experience a good one.

Recent Articles

Alex Rivera

July 10, 2023 • 3 min read

Alex Rivera

July 10, 2023 • 2 min read

Alex Rivera

July 7, 2023 • 2 min read

Back to top

7 Qualities to Look for in a New Lawn Care Provider

Make sure to thoroughly vet lawn care providers before they come and take care of your grass.

After dealing with the movers and unpacking all of your stuff, you may not feel like taking care of basic household chores, like mowing your lawn. Here are some things to look for when you’re searching for a new lawn care service.

1. Fully licensed and insured

When you’re looking for a quality lawn care company, one of the first questions you should ask is whether they are licensed and insured. Using an uninsured provider means that you could be liable for any damages or accidents that occur on your property. It’s best to take the safer route by hiring a company that’s licensed and insured in your area.

2. Customer service

Quality customer service is so hard to find these days, especially in the lawn care industry. Finding a lawn care company that will communicate with you regularly is a great thing. A company with strong customer service is also a way for you to have a clear channel of communication in case of delays or issues.

During your search, find out if the company has a website or social media account that they can be reached through. Also, read through other homeowner’s reviews to see if there are any complaints about lack of communication or bad customer service. Google’s built-in review tool is a great place to start, but you might also look at Angi or Thumbtack for a paid service, or Yelp! for local reviews.

3. Fertilization

Fertilization is one of the most important things for your lawn. Proper fertilization helps keep your lawn healthy and thick throughout the year. Ask lawn care providers what type of fertilizers they use and whether they outsource the job to another company or not. Some lawn care providers say that they will fertilize, but end up sending out a different company without your knowledge. If you have kids running around barefoot in the yard or pets that use the yard frequently, you want to make sure that you know exactly what’s been used, including whether it was organic or not.

4. Equipment maintenance

Sharp blades are crucial for proper lawn care and lawn health. Dull blades rip and weaken grass, leaving your lawn susceptible to fungal growth and diseases. Sharp blades not only help maintain a healthy lawn, they also decrease the time it takes to mow a lawn. When you start looking for a provider, make sure that you ask how often they sharpen their mower blades. A lot of quality lawn care professionals will sharpen their blades at the end of each day.

5. Contracts

Contracts are pretty normal in the lawn care industry, but you still don’t want to sign a yearly contract with a company that might be a bad fit. Some companies will offer a trial run before you get tied into a contract, which can help you figure out if they will be a good fit. Be sure to still check online reviews and testimonials about the company so that you get a good sense of the quality of work and customer service that you will receive once you become bound by contract.

6. Different service offerings

There are a lot of different services that a lawn care company can perform on your yard. Make sure to discuss what lawn care packages and services the provider offers prior to beginning a recurring program. Some service offerings you’ll want to ask about are: mowing and edging, aeration, overseeding, soil testing, and grub and disease control. If you’re not quite sure what kind of care your lawn needs, have the company come out and take a look at your lawn—they can typically give you a better idea. Inquire, too, about their local expertise; if they understand watering regulations in your city, or if they know plants and shrubs that are native to the region, and so on.

7. Services worth the price

Price doesn’t always mean quality. Some companies will inflate the price of a service without having the added level of quality. Ask the lawn care provider for referrals to see if they are really worth the extra money. A quality provider will have no problem sending you referrals and will typically stand behind their service.

Recent Articles

Alex Rivera

July 10, 2023 • 3 min read

Alex Rivera

July 10, 2023 • 2 min read

Alex Rivera

July 7, 2023 • 2 min read

Back to top

How to Hook Up a Trailer to Your Vehicle

We break down all the moving parts to hooking up your trailer, from the hitch to the coupler and everything in between.

A backup camera makes hitching a trailer easier, but with patience and a little bit of luck, you can hook up a trailer even without a back-up cam. By following these simple steps, you can do this on your own or with help from a friend.

Know the Parts of Your Trailer and Hitch

Most towing trailers are identical or closely similar to the diagram. Be sure to measure the ball on your towing vehicle to make sure it’s the same diameter as the cup on the hitch – that can be a big problem before you’ve even gotten started! Most auto parts stores sell different size balls, so if yours doesn’t match, it’s an easy problem to fix.

Hitching Your Trailer to Your Tow Vehicle with a Friend

If you have a friend help you, he or she can stand to the driver’s side of the trailer and direct you until the trailer ball sits below the coupler. Watch your friend through your side mirror, making sure they don’t disappear into your blind spot. Even with help, you may find yourself moving the tow vehicle forward and back several times until the pieces are lined up.

Hitching Your Trailer to Your Tow Vehicle by Yourself

If there’s no one around to help you, it may take more time and several steps just to get the ball lined up with the coupler. Start by backing your truck up to the coupler three or four feet at a time, getting out of the truck to see if the coupler and ball are lined up. Get back in the vehicle and make the necessary adjustments. As you get closer, inch the vehicle backwards, making course corrections each time. It helps to keep the driver’s side door open and look at the ground to judge short distances.

Avoid Frustrations

Don’t expect to line up the ball and coupler on your first try, and you won’t get as easily frustrated when you have to try and try again. If you need to walk away from the situation for a few minutes, do so. Often, you’ll line the pieces up perfectly on the first try after a short break to clear your head.

The 5 Final Steps to Hitching Your Trailer

Once the ball and coupler are lined up, the rest is easy.

  1. Make sure the coupler is in the “open” position.
  2. Lower the coupler onto the ball. If it’s lined up properly, the clamp release should close easily. If it’s not, get back in the truck and make adjustments until the ball is directly below the coupler.
  3. Feel the bottom of the tow ball to ensure the clamp is secure. Don’t judge by sight, as breakaway accidents can occur if the ball isn’t clamped in properly.
  4. Cross the safety chains under the tongue and connect them. The tow chains serve as extra protection in case the trailer does break away. The chains will help keep the trailer from careening off the road or into oncoming traffic.
  5. Plug the lighting harness wires into the connection in the back of your truck. Check to be sure the trailer lights work.

Time to Tow

If you go step by step, take your time, and don’t get frustrated, you’ll get your trip off to a great start.

Recent Articles

Alex Rivera

July 10, 2023 • 3 min read

Alex Rivera

July 10, 2023 • 2 min read

Alex Rivera

July 7, 2023 • 2 min read

Back to top

How to Seriously Cut the Cost of Moving

Lift more, save money—here are some ways to cut costs when moving to your new home.

Moving can be deceptively expensive. By the time you’ve purchased moving supplies, rented a truck, and/or hired movers, you’re looking at a pricey venture to your new destination. But it doesn’t have to be that way. If you’re looking for ways to cut costs for your move, we’ve got three strategies to help you get to your new destination without having to break the bank.

1. Get rid of everything!

We’ll begin with the most outlandish option on the list: move as few things as possible. As in, don’t take more than the clothes on your back.

Instead of packing all your belongings, hauling them from one city to another, and then unpacking all of them, just get rid of everything. Sell what you can and donate the rest. The only things you really need to carry with you are irreplaceable keepsakes, and you can simply ship those to your new location. The actual move will amount to little more than hopping a plane with a carry-on. Use the proceeds from your everything-must-go garage sale to curb the expense of buying new stuff when you land.

Granted, this suggestion sounds like something said in jest at first blush, but it actually has the potential to be both the cheapest and easiest option. In fact, if you’re committed to living minimally, this approach might fit like a glove.

2. Do it all yourself

If you’re not ready to sell it all and start over, there are less extreme options. One of these is to do the move on your own, sans professional help.

Moving without hiring the pros does not mean moving without any kind of help. To lighten your work load, enlist the help of a few friends, especially for big jobs like loading the moving truck. Be sure you’re well organized, ready to go when they arrive, and prepared to reward them for their efforts (pizza and drinks typically suffice).

If your move isn’t local, consider a service like U-Pack instead of renting a truck. With U-Pack, they’ll deliver a moving container directly to your home and give you up to three days to pack it. Then they’ll take care of hauling it to your destination. Once your stuff has arrived, you’ll have another three days to unload. You get plenty of time to load and unload the container, and you don’t have to worry about driving a big truck cross-country.

The key with a DIY move is to plan ahead and be prepared to work. Don’t go with this option if you’re averse to breaking a sweat. But if you don’t mind applying some elbow grease, you can reduce costs by doing it yourself.

3. Blend DIY Moving with Professional Movers

Another strategy is a balance between doing some of the work yourself, and hiring others to handle the big stuff. This hybrid approach can help lower the overall cost without saddling you with all the heavy lifting. And we are talking about the literal heavy lifting. Hire moving labor to help load and unload the truck or storage container, taking one of the biggest tasks completely off your to-do list.

There are several reasons to consider hiring movers. The first is purely pragmatic. In all likelihood, you own things you simply cannot lift on your own. Beyond that, moving is a big job. Even if you could do it entirely on your own, who wants to tackle something so big completely alone? Finally, moving labor will significantly reduce the amount of time your move takes. Loading a truck or container isn’t quick, but experienced pros can do it with impressive efficiency.

Just be sure to hire reputable, experienced movers. Look for moving company reviews on Google, find moving companies that offer free quotes, and go with a company that offers a fair price, and clearly outlines all of their services, and sets your expectations.

Choosing the best option is a matter of weighing the amount of work you’re willing to do against the amount of money you’d like to save. And if you don’t feel a particularly strong attachment to your stuff, the first strategy might be the way to go, even though it sounds a bit extreme. Whichever you choose, make it a point to think through all the logistics well before the big day. Moving is one of those things that requires a strong game-plan. Preparation will almost certainly make the entire experience less stressful.

Recent Articles

Alex Rivera

July 10, 2023 • 3 min read

Alex Rivera

July 10, 2023 • 2 min read

Alex Rivera

July 7, 2023 • 2 min read

Back to top

4 Tips for Hanging Your Decor

Here are all the right ways to turn your house into a home with wall decor.

Your home comes to you as a blank canvas. You’re responsible for giving it the personal finishing touches that make it comfortable, familiar, and reflective of you. We can help you add these decorations without causing damage to your home and the decorations themselves.

Selecting a Nail

It’s important to select the correct nail because a nail that’s not meant to handle the weight of your artwork could equal the demise of your frame. Usually you can use a standard finishing nail to hang your photos or artwork. These tend to look inconspicuous and don’t leave large holes in your walls. There are different sizes of finishing nails, so make sure you select one that’s strong enough to hold your wall art. The gauge size determines the strength. The smaller the gauge – a number between 16 and 10 – the stronger the nail. The 16-gauge nails are best for light-weight sconces and picture frames, while the 10-gauge nails are better suited for heavy pictures and frames.

If you want to hang a picture frame on brick, stone, or concrete, opt for a screw and pre-drill the hole. Screw anchors will give extra support. You may choose anchors, which are ideal for wall adornments that are between 10 to 25 pounds. They work well to hang smoke detectors, bulletin boards, lightweight shelving, and light fixtures. They work well for wall-mounted mirrors on plaster walls, too. All-purpose drywall anchors are great for heavy picture frames, door chimes and wall-mounted mirrors on drywall. Use pointed mollys for shelving on drywall or plaster, or for mirrors that are over 20 pounds and placed on a plaster wall. Tap-in anchors work best for loads under 10 pounds. Metal toggle bolts support heavy loads of 25 to 50 pounds in plaster, concrete block, or drywall. The plastic variety are best for drywall and plaster and should only hold 10 to 25 pounds. Use mirror clips for frameless wall-mounted mirrors.

Hammering in the Nail

When you hammer them in the wall, you should hammer at a 45-degree angle for the best results. Try hammering them into a stud if possible. If you’re hanging something heavy, it’s a necessity to nail it into a stud.

Getting It Straight

Use a laser level and begin by using the control to line it up how you want it. Lightly make a few marks going across your wall in pencil. If you opt for a standard level, position it where you want the picture. Get it as straight as possible. Take notice of where the bubble is. You should have it in the center. You may want to draw light pencil marks at the top, so you can refer back if the picture moves at any point. A ruler works well for gauging whether the picture has moved off your mark. When you hang multiple pictures, try using gridded wrapping paper. Cut a large piece and hang it on your wall. Make sure you use a level to ensure that the grid is on your wall straight. Tape the grid to the wall, then align your pictures and nails on the grid so that they are hanging in a pleasing arrangement. Don’t be afraid to nail through the wrapping paper – it’s easy to pull off the nail when you’re done.

Hanging Without Nails

There are a few different options you can select to hang a picture or mirror without marring your wall. If you can’t use nails, use hooks with adhesive. Make sure the hooks you use are rated high enough to handle the weight load you intend to put on them. Or try using heavy-duty mounting tape that’s double sided. Another option is removable picture hooks that utilize putty to adhere them to the wall. Frameless posters are affordable and good for temporary artwork. Additionally, you can string a clothes line (or curtain wire) in any room of your house and use clothes pins to display them. By using the above tips, your pictures will hang straight and look fabulous on your walls. Plus, you won’t risk damaging a frame or decoration by hanging it up incorrectly.

Recent Articles

Alex Rivera

July 10, 2023 • 3 min read

Alex Rivera

July 10, 2023 • 2 min read

Alex Rivera

July 7, 2023 • 2 min read

Back to top

365 Uses for a Cardboard Box

365 days in a year, 365 ideas for your spare cardboard boxes.

Not sure what to do with the cardboard boxes you stashed in the basement after your move, or just looking for a fun weekend project? We’ve got more than a few zany ideas on how to turn a boring box into something awesome. In fact, we’ve got 365, one new idea for each day of the year!

  1. Use scissors to can make any sheet of cardboard into decorative masquerade masks.
  2. Make a cardboard windsock by attaching a string to the top of a long, thin box.
  3. Cut a long thin strip of cardboard to serve as the strap for a cardboard purse. Make the purse out of two crescent-shaped pieces of cardboard.
  4. If you have those mini toy skateboards, you can use a cutup box to create a mini cardboard skate park.
  5. Tape the edges of a small box shut to create a cardboard flower pot.
  6. Make a pretend boom box/cardboard music box.
  7. Put posters in a cardboard tube to protect them while in storage or moving.
  8. Cardboard’s natural flat, stiff sheets are great for mimicking samurai armor for a children’s costume.
  9. Use a box and some scissors/tape to create a fun cardboard chair for dolls (or small children).
  10. A small box with two holes cut into the top and a slit in the side can be used to create a cardboard toy toaster.
  11. Cut out alphabet shapes for spelling words around the house.
  12. Use a few sheets of cardboard and some scissors to make decorative snowflakes.
  13. Keep your cords in order by using a box as your electrical cord storage go-to.
  14. Place honey and seeds on a used paper towel roll to create a bird feeder.
  15. Grab a piece of cardboard, sketch out a design, then cut the design out for a stencil mat.
  16. Place a gallon jug of water into a box with a small hole cut in the top, then attach a straw to create a cardboard toy drinking fountain.
  17. Lay a flattened piece of cardboard beneath soil to use it as a garden liner (keeps weeds from growing).
  18. Add paper towel tubes to a medium-sized box to make a “larger than life” play video camera.
  19. Grab some string and scissors and turn that spare box into a functional (and stylish) cooking apron.
  20. If you’re in need, turn that cardboard box into a disposable litter box for a cat.
  21. Turn those extra boxes into impromptu park benches.
  22. Use a few flattened cardboard boxes as carpet padding.
  23. Take two small cardboard boxes and poke a hole in one end of each box, then tie a small string between them for cardboard nun chucks.
  24. Cut, fold, and tape boxes together to build a giant fort.
  25. Create a fun Chinese parade dragon with a box, some paper, and other miscellaneous decorations.
  26. Use a large box (or multiple boxes cut open and taped together) to create a cardboard igloo for the backyard, for kids to sleep and play in.
  27. Cut cardboard into strips. Slit halfway through strips and join slits to create cardboard grid that you can place in a shoebox and use for a rock collection.
  28. Take a small box (or a few pieces of a large box cutup and taped together) to make a box for storing crayons, pencils, or markers.
  29. Cut a box open and lay it flat to make a screen for a TV or movie projector.
  30. Cut out the desired shape and use markers and string for holiday ornaments.
  31. Attach some wheels to a number of flattened boxes (taped together) to make a cardboard skateboard.
  32. Fold up and stuff under wobbly table leg.
  33. Use an empty box (or a few strips of cardboard cut from a box) to create a quick raised garden bed.
  34. Cut a small circle out of the sides of a box to make a cardboard play pizza, then use strips of cardboard and colored markers to create toppings.
  35. Turn a cardboard box with a lid into an easy-to-use piggy bank by cutting a small hole in the top (it’s that easy!).
  36. Rollup a single sheet of cardboard so that one end is larger than another to make a simple megaphone.
  37. Using a flat box to cut out the frame, use some string and markers to create a cardboard tennis racket.
  38. Use the boxes for storage (duh).
  39. Use an empty box or two as a cardboard foot locker for clothes or shoe storage.
  40. Use some scissors, glue, and rubber bands to make a cardboard guitar that can actually play.
  41. Get out your paints and glue to make a mini-cardboard Tardis time machine.
  42. Cut out a dinosaur silhouette as a cardboard decoration for a child’s room.
  43. Catch a wave on a cardboard wakeboard made from a few boxes laid flat on one another. No promises this will actually work on the water.
  44. Put pieces under the legs of furniture for furniture sliders.
  45. Sides of a box can be cut out to make cardboard backboards for posters.
  46. Cut out the side of a box and write your feelings down with a marker to create protest signs.
  47. Small boxes can be filled with dry beans and taped closed, then decorated to make maracas.
  48. Wrap the box in fancy paper to use as a present, after putting something inside of it of course (as a gift).
  1. If you cut one side of the box open you could make a cheap wind protector.
  2. Create cardboard animal trophies by cutting layers into shapes that can be glued together to make a 3D-like statue.
  3. Gym locker for kids to store their belongings at home.
  4. If you really need to: use a sheet of cardboard to cover a whole and create a booby trap to catch animals.
  5. Use a small box and a long cardboard tube to create a play bazooka.
  6. Use a large photo and create a life-size doppelganger.
  7. Use a thin piece of cardboard (or tear a thick piece apart) to use as a coffee filter.
  8. Cut a few strips out of a cardboard to create a fun picket fence.
  9. Using string to hold the finished product in place, make a Power Rangers or PJ Masks or any other superhero mask with colored markers and scissors.
  10. A few strips of cardboard can be bent and drawn on to create a cardboard toy car race track.
  11. Say goodbye to the knots by storing Christmas light in a box dedicated to doing just that.
  12. A small cardboard box can easily turn into a toothpick holder.
  13. Cut out blocks of cardboard from a box to make fun dominoes.
  14. If you want to try standing at your desk, use a box as a laptop stand.
  15. Cut a hole in a narrow box then hang it in your pantry as a plastic bag holder.
  16. A few boxes can be stacked together and supported with wood (or another durable material) to create a cardboard entertainment center.
  17. Turn a cardboard box into a toy crib by using some pillows and blankets.
  18. Decorate a single box to create a stuffed animal house for kids.
  19. Stack a few boxes together to create a temporary lamp stand.
  20. Use a sheet of cardboard as a placemat to protect your table from hot plates and pots.
  21. Cut out a small piece of cardboard and fold it up to create a hockey puck.
  22. Use as a mixing pad with a piece of cardboard, an ice cream stick to mix together hardener and bond.
  23. Cut basic shapes out of the side of a box for a child to use as a shape sorter to help them learn shapes and colors.
  24. Use a box or two as your own recycling bin for managing recyclables.
  25. If you’re in need, use a sheet or two of cardboard to create a car trunk protector.
  26. Cut a sheet of cardboard however you need to be used as a papier mâché frame.
  27. Cut small squares from a box (decorate them if you’d like) to create cardboard drink coasters.
  28. Play microwave for the kids to cook “food” in, also made of cardboard.
  29. Turn a box into a cardboard doghouse by setting it on the ground.
  30. Use a tall box as a spare armoire.
  31. Use two small pieces of cardboard cutout from a box to create toy pop tarts that can be colored with pencils or markers and glitter.
  32. Use several large boxes as a desk.
  33. Use small blocks of cardboard to create toy people with pipe cleaner arms, or cut out people shapes from a box to make play people.
  34. Attach a few water noodles to the top of a box and cut two sides out in order to create a mini play cardboard carwash.
  35. Take a medium-sized box, tape all the ends closed and use it as an end table or coffee table.
  36. An empty box could make for a great lamp shade (just be sure to keep a fire extinguisher nearby).
  37. Cut one wall off of a small box and use it as a dust pan.
  38. Scratch your address on one side of an empty box and put it outside to create a cardboard mailbox.
  39. Using a cardboard tube (or a long, thin cardboard box) attach a flat, cutout piece to the end to make a toy scythe.
  40. Cut a box into layers to use as a spray paint shield.
  41. Use some scissors to cut out a cardboard play mounted deer or elk.
  42. Make a cheap iPhone case by cutting and taping a few pieces of cardboard together.
  43. Cut a thin strip of cardboard out and color it to make a decorative snake.
  44. Pot holder (just make sure it doesn’t get too hot!).
  45. Flatten, tape together, and paint multiple boxes to make a play stage backdrop.
  46. Grab some paint and tape to turn cut out shapes into a fun cardboard landscape for a train or action figure play set.
  47. Use scrapbooking stencils to cut cardboard sheets into designs with more texture and dimensionality than typical scrapbooking supplies allow.
  1. Use the boxes for what they’re made for: travel storage when you move.
  2. Cut a box up to create simple kindling for a fire.
  3. Play a life-sized game of Tetris by using boxes taped together into various Tetris shapes and colored with paint.
  4. A flattened box can be used to make a diorama project.
  5. Using a few rolls of cardboard, a box, and some string, you can create a cardboard xylophone.
  6. Use individual pieces of cutup cardboard as temporary floor tiling.
  7. To make a bird’s nest, shred apart some cardboard and mold into a bowl.
  8. Use two or three boxes, some colored markers, and tape to create a play piano.
  9. To make a chalkboard, pin a piece of cardboard to the wall. You can spray paint it for different colors.
  10. Cut a large hole out of one side of a box to make a fun, pretend cardboard TV.
  11. Put some bait in the end of the box and wire a flap door to create a simple animal trap.
  12. Build a one-of-a-kind cardboard record player using a paper clip for the needle suspended by a pencil anchored by an eraser.
  13. Cut a few holes out of a box and use it as a cardboard holiday luminary.
  14. A sheet of cardboard makes for a great glue mixing pad.
  15. Color a medium-sized box black and yellow after cutting the open sides of the box into four wheels to create a Flintstone-style school bus.
  16. Take a flattened box and fold it in half, then color it with markers to create a fun cardboard UFO for kids.
  17. Strap some balloons to a small box to create miniature hot air balloons.
  18. A small box and some headphones can be used to create a cardboard iPhone.
  19. Fill your walls with shredded boxes to insulate a shed or cabin.
  20. Use small squares of cardboard cutup to make bingo markers, then use a big sheet of cardboard as a bingo board.
  21. Make a plinko box with gifts and prizes to win.
  22. Cut out a single side of a box and place it by a door for an instant cardboard door mat.
  23. If you use a vacuum sealer for storing clothes or belongings, use cutup cardboard as a vacuum block to protect the shape and condition of the items.
  24. Use some markers to create a miniature billboard.
  25. Use a silver crayon to make a police badge.
  26. Use a flattened sheet of cardboard with various “blocks” taped to it at different angles to create a fun marble maze.
  27. Cut up pieces of extra cardboard boxes to create durable envelopes.
  28. Police jail with a door and bars on the windows.
  29. A few sheets of cardboard can be used as dresser drawer separators.
  30. A single box can be painted to create a quick and easy SpongeBob Squarepants costume.
  31. Add honey or glue to strips of cutout cardboard to create your own insect traps.
  32. Keep your clothes nice or separated with cardboard luggage inserts for the next time you travel.
  33. Use a propped-up box as a simple painting easel.
  34. Tape together several long pieces and lay them on a set of stairs to create a cardboard slide.
  35. A long cardboard box can make for a simple vase.
  36. With some crayons and scissors you can use one side of a box to create a cardboard toy mirror.
  37. Use layers of cardboard to create imitation crocs shoes.
  38. Use cardboard tubes or rolls with a sheet of cardboard taped to the bottom to make dice shaker cups.
  39. If you’re into archery you can use a few cutup sheets of cardboard to make an arrow quiver.
  40. Use paper plates as wheels to create a toy cardboard jeep.
  41. Strap some wheels (paper or real) onto the box to make a play pioneer wagon.
  42. Take a small, square box and crumble it up, then wrap duct tape around it to make a cardboard basketball.
  43. Use a few sturdy boxes as temporary stairs (if you dare).
  44. A cardboard box makes for a fun play tunnel for kids or animals.
  45. Use a cardboard box as storage for children’s toys by letting them decorate the box how they see fit.
  1. Let your dog or cat make itself at home on their very own cardboard pet futon.
  2. Make some fun cardboard block prints.
  3. Use an empty box as a flower collection holder.
  4. Take the cardboard from used paper towel rolls and place them in boots to keep them upright.
  5. Use a small piece of cardboard cut from a box as a mouse pad.
  6. Uncomfortable sandals can be made from a sheet of cardboard cut out to the size of your foot. Secure the sandal bottoms to your feet brads and ribbon.
  7. Use a thin strip of cardboard as a quick bookmark.
  8. Use multiple, small boxes and some pens to create a mini cardboard cathedral.
  9. Cut a box so it opens length-wise, then use some markers or colored pencils to create a long banner for announcements.
  10. Cut two circles out of a sheet of cardboard, then attach some cardboard tubes to create some ping pong paddles.
  11. Use a box with both ends open taped to a garage or doorway as a basketball basket.
  12. Waterproof glue and some paint to create a canoe and paddles.
  13. Excess cardboard can be used as a great floor insulator for your home.
  14. With some simple supplies from the craft store a few pieces of a cardboard box could be used to create a miniature house or landscape display.
  15. Create a tall hat, a table, and small tea “cups” from cardboard to create a Mad Hatter themed tea party.
  16. Make a bracelet rack by rolling together a piece of cardboard and gluing together.
  17. Cut the sides out of a box and use another box to create thin shelves in order to make a cardboard book stand.
  18. Add tinfoil to a flattened box to create a cardboard beach sunshade.
  19. If you have a crooked chair or table, use a few pieces of cardboard as a soft lift to balance them out.
  20. Cut a few holes into some painted boxes to make Minecraft costumes.
  21. Make a cheap car trunk organizer.
  22. Use scissors to cut out some giant cardboard toy keys for children.
  23. Make a cardboard watchband by cutting a strip or two from the side of a box and rolling it up. Draw a face on the watch with pen or marker.
  24. Draw something on flattened boxes and cut them up to make a cardboard puzzle.
  25. Cut out shapes or glue pieces onto tiny boxes to create cardboard toy animals.
  26. Use a pillow case, cardboard tube and a box for a pirate ship.
  27. Cardboard is great for making a gingerbread house frame, so cut up a box to make a nice template.
  28. Create an instant board game by drawing on a flat piece of cardboard and using smaller pieces of cut out cardboard as game pieces.
  29. Cut out some cardboard sunglasses and stylize them to fit your style.
  30. Use a long cardboard box to create an umbrella holder bin.
  31. If you’ve got to work under a car you can use a flattened box as a mat for laying on.
  32. A small box can easily be turned into a fun cardboard top hat.
  33. Make a flattened piece of cardboard into a hanger liner to prevent creases.
  34. Silver or black paint can be applied to make a box into a toy bank vault.
  35. Make a cardboard wind turbine using various pieces cut out from a box.
  36. Make a keyboard, mouse and monitor to use as a play computer.
  37. Use a small piece of cardboard cut from a box to create a liner for a bird cage (works great for easy and quick cleaning).
  38. A small box can be used as a “parking garage” for Hot Wheels toy cars.
  39. Using a flattened cardboard box and a series of cardboard tubes you could create a bee nesting tube (if you like bees).
  40. A few sheets of cardboard and a stick can be used to create a decent snow shovel.
  41. Cut a small piece of cardboard out to use as a hand fan to cool yourself off.
  42. Color a flattened sheet of cardboard to make a fancy “Persian rug.”
  43. Attach a long cardboard tube to the front of a box to create a play tank.
  44. Cutup a box and use the scraps as cardboard bedding for your animals.
  45. Using measuring tape to mark off inches onto a cardboard box flap for a temporary straight-edge/ruler.
  46. Grab some paints or oils and use cutup cardboard as a painting canvas.
  47. Either use a small box or cut and fold a large box into a trading card holder.
  48. Keep the lid to a shoebox or larger cardboard box. Tip the box onto its side and cut out a viewing square for a shadowbox display.
  49. Use a long cardboard box as a vacuum wand extender.
  50. Cut a few lines into a box and crush it slightly to make a cardboard chew toy for pets.
  1. Create a toy boat by drawing on the box and placing a stick or long tube in the center with a pillowcase as a sail.
  2. Cut out the side of a box and duct tape a small strip of cardboard to the back to create a toy shield.
  3. Use a stack of boxes as a cardboard filing cabinet.
  4. Cut out pieces of cardboard and color them with colored pencils to make cardboard bacon for kids to play with.
  5. Make a toy rocking horse by cutting out a horsey shape attached to two smiling runners. Color to taste.
  6. If you’re pouring concrete you can use boxes for the mold.
  7. Use markers and sticky notes to create an action sheet for kids to help with chores.
  8. Cut an Easter egg design out from a sheet of cardboard to use as a decoration for Easter.
  9. Tape two pieces of flat cardboard together to create a CD or DVD storage case (be sure to label what’s inside with a marker).
  10. A small strip of cardboard can easily turn into a handy phone charger station.
  11. Cut out some small shapes and decorate both sides to create some earrings.
  12. Use markers or paint to color a box red, then use the top flaps to make a cardboard toy barn.
  13. Small boxes can be used for a temporary lunchbox (for kids or adults).
  14. Use some markers and crayons to create a street sign for a yard sale or lemonade stand.
  15. Create your own greeting card with box scraps and markers or other decorative supplies.
  16. Use a box as a cardboard toolbox for the garage or workshop.
  17. Grab some markers or paint and turn flat cardboard boxes into elements for a stage design.
  18. Grab a few sheets of cardboard and tape or glue them together to make a snow sled.
  19. A torn-up piece of cardboard can be turned into a fun treasure map for kids to use.
  20. Use 1′ x 1′ squares as seating cushions on bleachers or hard stadium chairs. Tape multiple sheets together for maximum cardboard comfort.
  21. Strips of cardboard can be used as nesting material for a pet.
  22. Cut out the sides of a box to form a diamond shape in order to make cardboard baseball bases.
  23. Get handy with some scissors and glue to create a simple (or elegant) cell phone cover.
  24. Flatten out a set of boxes to create a slick dancing floor (great for break dancing).
  25. Attach a small box with a hole cut out of the middle to a plank of wood to create a cardboard birdhouse.
  26. An ineffective boat prop can be made by gluing the propeller fins to a paper towel tube.
  27. Use a book to measure then cut a piece that is slightly larger so you can fold the ends to make a book cover.
  28. Use a flat piece of cardboard and some pins to show off your butterfly collection.
  29. Fold a few pieces of cardboard over and tape them together to create a functional (but temporary) snowboard.
  30. Make a 3d chandelier by cutting the boxes into diamond shapes and then stringing and taping them together.
  31. Use your imagination and some tape/marbles to create a quirky pinball machine.
  32. Add glue and/or honey to create a cheap fly-trap.
  33. Use spare cardboard boxes as fruit and vegetable storage.
  34. Use a template and layer pieces together to create cacti.
  35. Make a cardboard ukulele from layered cardboard and strings.
  36. Cut a few holes into a large box to create a cheap wine rack.
  37. Cut an opening in the walls on the long side of a box so it can fit your lap as a bed tray.
  38. Cut out the shape of a ghost to make a fun cardboard Halloween decoration.
  39. Tape or glue a few sticks or thin pieces of cardboard to the top of a large box in order to make some toy cardboard luggage.
  40. Use a box cutter, plastic cups and paint to create a police car.
  41. Use a flattened sheet of cardboard as a temporary cutting board.
  42. A small box can be used to store leftover food (particularly good for storing uneaten pizza in the fridge).
  43. Use layers of cardboard as insulating camping pads.
  44. Flatten a large box to make a temporary cardboard surf board or body board.
  45. If you’ve got a lot of old VHS tapes or DVD/Blu-Ray videos, use a box to store them by genre.
  46. Use some scissors to create a template that you can put inside clothes for maintaining their shape while in storage.
  47. Try putting strips of cardboard inside wet shoes to draw moisture out.
  48. Create abstract art by overlapping square cutouts with glue.
  49. Cut cardboard into strips and tape those strips onto a dowel to make a toy for cats–they go crazy for the stringy cardboard strips.
  50. Donate a box to someone who is moving, or a shelter.
  51. A few strips of cardboard (or small boxes cut in half) can make for great office/desk organizers.
  52. A few cuts and some glue can turn a cardboard box into a fun Star Wars speeder for kids to use.
  53. Shred old cardboard boxes to pack valuables into new ones. The strips of cardboard can protect your fragile stuff.
  54. Make a toy rocking chair using crescent-shaped runners, two flat sheets of cardboard, and strips for legs.
  55. Collect a lot of magazines? Use an empty box as a simple magazine holder.
  56. Gather a few boxes and color them with pencils or markers to make a mini city skyline.
  57. An old box can easily be used for storing grocery bags.
  58. Use a few sheets of cardboard cut to fit your drawer in order to make some sock drawer separators.
  59. Use a thin cardboard box rolled up to make a refillable caulking tube.
  60. Attach popsicle sticks to the top of a small box and decorate it with a marker to make a cardboard toy helicopter.
  61. Create a fun fruit stand for kids.
  62. Make your own cup holder (or coffee cozy) with a strip of cardboard rolled up and taped on one end.
  63. A few boxes can be used to create a cat condo, with windows and doors cut out in various places.
  64. Strap or glue a balloon to a matchbox with button wheels and toothpick axles to create a self-propelled vehicle.
  65. Use a small box as a jewelry box.
  66. Place a strip or two of tape (with the sticky side facing out) around a cardboard roll in order to create a lint roller.
  67. Use some scissors and glue to create a play cardboard toilet (we suggest not using a box as a real toilet).
  68. Use old boxes as oversized Lego blocks.
  69. Why not use an empty box as a temporary laundry hamper?
  70. Lay a flattened sheet of cardboard under carpet to use as insulating and padding.
  71. Cut out a large sheet of cardboard to match the size of your windshield. Fold it into fifths, wrap it in tinfoil to maximize sun blockage.
  72. Two small boxes can be colored and cut to make some fun, cardboard monster-looking feet.
  73. Cut a box so it’s flat and use it as an instant window shade.
  74. Cut flattened boxes into a fun headboard design for a child’s bed.
  75. Cut out silhouettes of animals for use as hunting targets.
  76. If you’re feeling ambitious, grab some tools and a spare bike to create a kinetic cardboard rhino.
  77. Cut out card-sized pieces and use crayons or markers to make a custom cardboard card deck.
  78. Use one box as a container and another as a dispensing unit with a thin piece leading to a hole in order to create a cardboard candy dispenser.
  79. Play stove for the kids to cook “food” in (also made of cardboard).
  80. Shred or cut cardboard to create chew material for a rabbit to enjoy.
  81. A sturdy box (or a series of boxes stuck within one another) can be used as a small stepping stool.
  82. Dip cardboard in plaster and, after letting the cardboard dry, spray with sealant to temporarily repair holes in your roof.
  83. Using an empty cardboard box, some tape, sticks (or pencils), and a few strips of cardboard, make an intricate marble run.
  84. Hang cardboard from the ceiling between two rooms to create a type of door.
  85. Soundproof your room by using cardboard as sound panels by placing sheets against walls and windows.
  86. With enough boxes you can make a mini cardboard haunted house.
  87. Cut out one side of a cardboard box to create an artist’s pallet for mixing paint.
  88. Stack and glue a few boxes together to create a cardboard bookcase.
  89. Use a box turned sideways as a cardboard hockey net (for a game of street hockey).
  90. Grab a box and line the inside with a removable plastic sack to create a trash bin.
  91. Use a single sheet of cardboard and a mothball attached to a pencil to make a “quiet gong”.
  92. A strip of cardboard can easily be used as disc sand paper.
  93. Check for household leaks by laying out a piece of cardboard for a few hours.
  94. Stack boxes and tape them together to make a fun cardboard kitty playground.
  95. Cut a viewing hole in one side of a box and attach a cardboard “claw” to a string taped to the top in order to create a cardboard toy crane machine.
  1. A few sturdy boxes can be used to create your very own cardboard throne.
  2. Stuck a flattened cardboard box on the floor to use as a “drop cloth” while you paint.
  3. Use a series of boxes painted and taped to a vehicle base to create a home-made parade float.
  4. Cut out animal figure and some arrows to make a cardboard weather vane.
  5. Make some cardboard swords by cutting out a pattern from a flattened box.
  6. If you cut pieces of cardboard into small strips you can make durable cupcake liners.
  7. Make a small animal kennel out of a box by cutting a door from one side (and some breathing holes).
  8. A few boxes can easily transform into a cardboard drum set.
  9. With some scissors and tape you can turn boxes into fun stage props.
  10. Strap some tape or straps on a box to make a cheap backpack.
  11. Cut out one side of a box to create a cardboard soccer goal.
  12. Get crafty with some scissors and tape to create a cardboard bulldozer for the beach or sandbox.
  13. A small box makes for a great way to store knitting needles.
  14. Cut a few pieces of cardboard into various shapes to make custom cookie cutters.
  15. Use two small boxes with holes cut in the tops to create some quirky cardboard shoes.
  16. Use cutup strips from a cardboard box to make decorative mini apples.
  17. Bring out the charitable side of your neighborhood or office by using a box for clothing donations.
  18. Use spare boxes for food storage.
  19. Use paint and a flattened cardboard box to create an “Alice in Wonderland” card costume.
  20. Use black and red crayons to create checkers and a checker board.
  21. Get crafty and turn a box into a dollhouse by decorating it with markers and fabric.
  22. A few pieces of cardboard can be used as insulation to protect fragile items.
  23. Fold a piece of cardboard into thirds so you can fold it back onto itself, then glue another piece to it as a diagonal support to create cardboard bookends.
  24. If you need it: use a box as a pillow by smashing it down somewhat but keeping one side smooth and flat.
  25. Cut out a cardboard template of a hand and use it to keep your gloves in good condition.
  26. Use duct tape and back lighting for a bar to serve drinks.
  27. By cutting a few squares out of cardboard and using tape to put them together you can make a really fun windball.
  28. Add some color and other materials with glue or tape to create artistic cardboard sculptures.
  29. Flatten a box and use it to cover a broken or cracked window.
  30. Cut sheets of cardboard into seashell designs. Cover with white paper and color with marker for a snazzy backdrop.
  31. Use boxes of different sizes to create a Lego costume.
  32. A few sheets of cardboard can be taped together and placed on a downward slope to make a cardboard slide.
  33. Strip apart the layers of a piece of cardboard to create a quirky pocket pen protector.
  34. Use an exacto knife and a flattened box to create life-size cutouts of people for decoration or to deter would-be robbers.
  35. Tape a few triangle pieces to the ends of a small box, then cut a hole in the top of the box to create “dinosaur feet.”
  36. Use a small box as a paper holder for the office.
  37. Use a small piece of cardboard and some scissors and crayons to create a fun, toy microphone.
  38. Long, thin cardboard boxes can be used as storage for fishing poles.
  39. Use a single piece of cardboard with keys drawn onto it to make a play computer keyboard.
  40. Just lay a flat piece of cardboard on a flat service for a portable ironing board (be careful not to get burned and to not start a fire!).
  41. Fill a box with candy and tape it shut, then decorate it with colored pencils and strips of paper to make a piñata.
  42. A few sheets of cardboard can be folded, cut, and placed together to make a fun teepee tent.
  43. Create a solar system support structure by attaching Styrofoam balls to pencils glued to the base of the box.
  44. Sides of a box can be cut out in different shapes and colored with pencils or markers to make cardboard toy food.
  45. Use a small box with either two belts or ropes attached to it in order to create a toy cardboard rocket pack.
  46. Some scissors can easily turn any box into a few easy-to-decorate picture frames.
  47. Turn an empty box into a play washing machine or dryer for kids.
  48. A long box and a flattened box can make for an interesting cardboard umbrella.
  49. Use a spare sheet of flattened cardboard as a spray paint shield.
  50. Cut some of the length off of a box to create a recyclable utensil tray or organizer.
  51. Make a play dishwasher and dishes for a playhouse.
  52. Take out your current shoe liner and draw an outline for a replacement boot or shoe liner.
  53. Cut a slit into the front of a thin box to create a play cardboard DVD player.
  54. If you’re in the process of moving, use a large box as a temporary dining room table.
  55. Use a box as a dust cover by cutting down one side and laying the box over whatever it is that needs covering.
  56. Make a quick and easy motorcycle or bicycle seat with some cut out cardboard and duct tape.
  57. Layer several pieces together for a cat scratcher.
  58. Decorate a child’s room or play room with cardboard, life-size animal cutouts (decorated however you’d like).
  59. Cut into a squiggly design to create a seaweed backdrop. Color with poster board glued onto the cutout.
  60. Flatten out a cardboard box to create a frame for snow fort.
  61. Cut a hole into the box and add a bag to make a disposable camping toilet (cardboard can’t do much for the smell, unfortunately).
  62. Cut out three or four fins for the fletching on a cardboard tube that you cap with cone of cardboard or paper to create a rocket ship.
  63. Attach some toy wheels to a small box and use crayons to color them and make some cardboard toy train cars.
  64. Tape a few fins to a larger box, then paint it to make a cardboard space shuttle for kids.
  65. Piece together large pieces for a homemade gazebo.
  66. Cutup a few boxes and use the scraps as packing material for breakables while moving or storing your stuff.
  67. A few sturdy boxes, a few planks of wood, a lot of glue, and some sweat can turn into a fun child’s playhouse.
  68. Glue some felt onto a sheet of cardboard and glue on some small walls to create a cheap, cardboard pool table.
  69. Cut out some silhouettes or staple some white paper to a large circle to create shooting targets.
  70. A few spare boxes can be cut, glued together, and decorated to create a cardboard ice cream truck for kids.
  71. Stick a phone into the box and voila: instant, somewhat private, phone booth.
  72. Make a temporary tree fort using wood as a base and cardboard as walls/decorations.
  73. Fold a sheet of cardboard in half to use as a (fairly reliable) document protector.
  74. Add cardboard or paper ducts and use some paint to create a blocky robot suit.
  75. Tape two flat pieces of cardboard to a large box to create a quick-and-easy toy airplane.
  76. If you’re a crafty type you can use a small box to store fabric scraps, decorating it to match what’s inside (of course).
  77. Use a small cardboard box as a card holder (for greeting cards, postcards, valentines, etc.).
  78. If you have hardwood floors, use small sheets of cardboard as padding under chairs to protect the floor.
  79. Use a box taped shut as a temporary nightstand.
  80. Create a small, cardboard maze or use a rolled-up sheet of cardboard to use as hamster toys.

Recent Articles

Alex Rivera

July 10, 2023 • 3 min read

Alex Rivera

July 10, 2023 • 2 min read

Alex Rivera

July 7, 2023 • 2 min read

Back to top

The Best (and Worst) Locations for Your Internet Router

From the mantel (do) to near the kitchen (don't), here are some ideal—and not so ideal—spots to place your WiFi router.

According to complex mathematical algorithms, the best router location in any house is high off the floor and out in the open, close to the ceiling and the center of the house. And not one of us will ever put our router on a pedestal in the middle of our living room. So instead, here are some places you should — and shouldn’t — hide your router to improve your wireless signal.

Image by Lifehack.org

Where to Place Your Router

Sometimes a simple, easy fix is enough. Consider these three locations for strengthening your Wi-Fi signal considerably.

  • Upstairs: While it may be effective, suspending your router from your ceiling definitely won’t win you any interior decorating awards. Instead of high up on the first floor, try placing your router on the ground on the second floor of your home. That way, the warm, fuzzy aura of Internet can reach down into your whole home.
  • On the mantel: Higher up off the ground? Check. Close to the center of the home? Potential check. While it might not be the most attractive thing to place beside your porcelain cat figurines, getting that router higher up in the room may be worth it for the boosted signal.
  • Within sight: The best place for your router is within sight of whichever device is using Wi-Fi. If you can’t keep it in the line of sight of your PC, laptop, tablet, phone, and game console, keep it close to whichever device you use the most.

Where to Avoid Placing Your Router

Not all nooks are created equal. Some parts of your home will significantly dampen your Wi-Fi signal.

  • Near the kitchen: Metal messes up your router’s Wi-Fi signals, as does your microwave — the two devices use the same frequency. If your signal wigs out every time you microwave something, or if your Wi-Fi is unexplainably weak, put some distance between the kitchen and your router.
  • Near walls, concrete, and everything else, apparently: Walls dampen Wi-Fi signals significantly, as do concrete, insulation, glass, brick, water, mirrors, and file cabinets. Drywall is fine, and open doorways are good, too.
  • In storage spaces: While it might seem nice to tuck that blinking metal box away in a cabinet or storage crate, the enclosed space might make your signal bounce around, diluting its strength. It’s also another layer that the signal needs to get through, which won’t do your speed any favors.
  • Near other wireless devices: You’ll want to keep your router about three feet away from most other electronic devices — and especially far away from anything using a 2.4GHz frequency. Appliances that use that frequency include cordless phones, baby monitors, car alarms, and anything Bluetooth-enabled.

Ways to Improve Your Signal Strength

If you’ve tried placing your router upstairs, on the mantel, within sight, and away from walls, concrete, and metal and you still aren’t getting a strong signal, you might have to look beyond simply moving your router for a signal boost.

  • Adjust the antennas: Try readjusting your router antennas for better reach. Pointing the antenna upward sends the signal farther out horizontally, while pointing it sideways will do the same vertically.
  • Buy a signal booster: When all else fails, buy a signal booster or extender. They can get you faster speeds in more parts of your home and are usually an easy fix for a spotty connection.
  • Get a new internet service provider: If none of these work, it’s possible your internet service isn’t up to par with what you need. You may want to consider getting a new internet provider.

Even though we feel like we can’t live without the internet, few of us are willing to sacrifice aesthetics for improved WiFi signal.

Recent Articles

Alex Rivera

July 10, 2023 • 3 min read

Alex Rivera

July 10, 2023 • 2 min read

Alex Rivera

July 7, 2023 • 2 min read

Back to top